STAY WITH ME
PROJECT DETAILS
TITLE: STAY WITH ME
DATE: 25 MARCH, 2016
CATEGORY: DIGITAL ART
ONLINE: ANOVIUS.DEVIANTART.COM
CREDITS:
Man pulling rope:
jademacalla: Frost BonVoyage 5
Model: Jade
Photographer: Mrs. Macalla
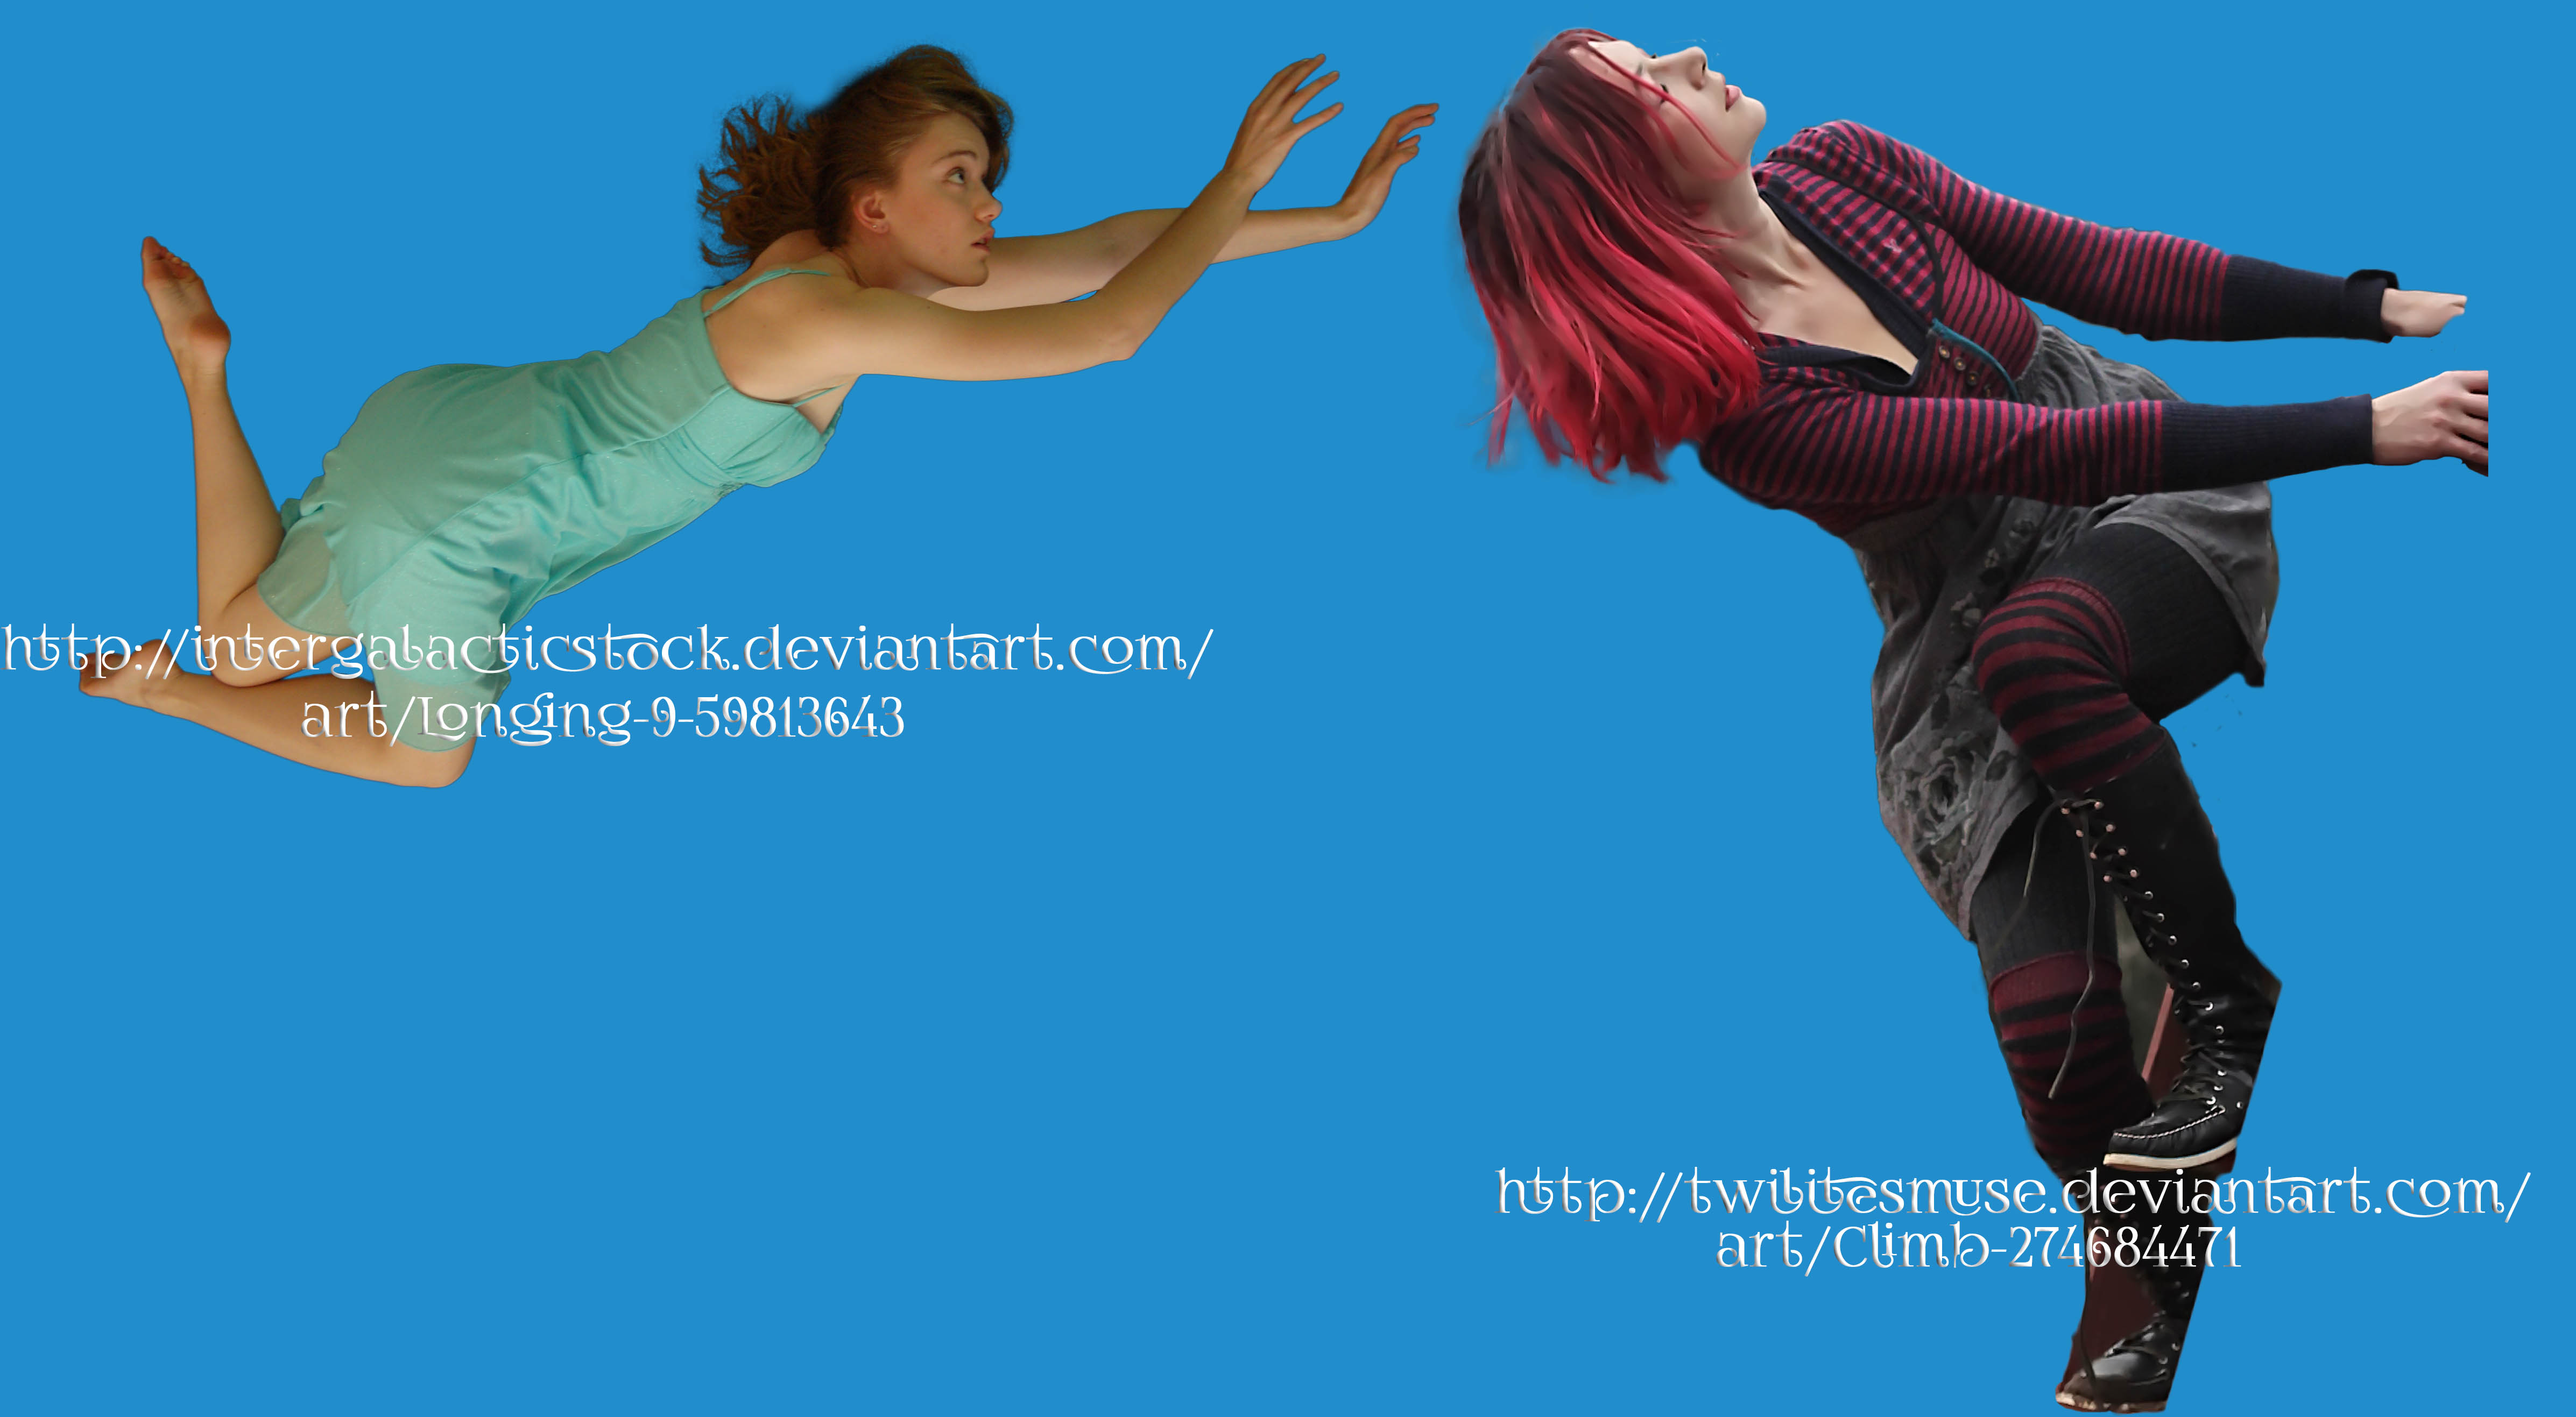
Redhead Mermaid:
TwilitesMuse: Climb
Blonde Mermaid:
intergalacticstock: Longing 9
Mermaid Tail:
DeviantRoze: Mermaid Tail 10
Mermaid Tail:
DeviantRoze: Mermaid Tail 05
Jumping Dolphins:
EveLivesey: 2 Dolphins
Swimming Dolphin:
Della-Stock: Dolphin Stock 2
Shells:
aswad-hajja: 31 Shells Stock
Turtle walking through barrier:
ponyfleute: Big Turtle
Swimming Turtle:
wolverine041269: Green Sea Turtle 8
Seahorses:
wolverine041269: Seahorse 08 and Seahorse 04
Small school of fish:
wolverine041269: Butterfly Fish 05
Large school of fish:
Della-Stock: Sea World Yellow Fish
Pair of purple/red fish:
darkadathea: Colours Fish
Buoy:
YBsilon-Stock: Buoy
Ocean Surface & Sky:
venomxbaby: Caribbean Beach Stock 2
Underwater Texture:
dadrian: Underwater Texture 2
Cracked Stone Floor:
kuschelirmel-stock: Cracked Earth Originals
Cruise Ship:
meihua-stock : Cruise Ship 1.2
Flying Birds:
Momotte2stocks: Seven Flying Seagulls
Standing Seagull:
thinkGIMP: Seagull
Stanchion Posts:
camelfobia: Lantern Pole
Coral:
darkadathea: Purple Coral, Red Coral, and Yellow Coral
Sand (ocean bottom):
phantompanther-stock: Sand Stock 0001
Seaplane:
scrappapertiger: Seaplane
Sea Tree:
pricecw-stock: Seaweed 3 - oct
Rock under sea tree:
CAStock: Solidified Lava 2
Water splashes for fin & buoy:
Moonglowlilly: Splash 6 and Water Splash 3
Canon:
FantasyStock: USNA Bancroft Hall Canon
Anchor:
specialoftheweek: Vintage Ship Anchor
Bubble Brushes:
FrostBo: Underwater Realistic Bubble PS
millertimemsu: Water Bubbles Brush
MorganBW: Underwater Bubble Brushes
Caution Tape on right:
m01229: Yellow Caution Tape CC BY 2.0
Caution Tape on left:
Drawn by me
Human tug o’ war victim:
Me
PROJECT DESCRIPTION
There are quite a few photo manipulations centered around a surreal, cube-shaped ocean, some of which I really like. One of my favorites is Aquarium by JoeDiamondD. I have been wanting to create one of my own, but without copying the ones that have already been done. That said, this my twist on the idea. Rather than doing a 4-sided body of water, I chose to use the actual ocean.
I created a magical cross-section at the edge of the ocean where one can pass through the walls of water. Caution tape was placed along the wall to warn those who may inadvertantly enter the water. Here, we see a mercenary or security personnel pulling a man out of the ocean through one of these magical walls. His love, the mermaid, wants him to stay with her. They are holding onto one another in an attempt to be free from the guard's grasp. Meanwhile, a turtle is beginning to explore the world outside of the ocean.
I have never done anything with this many stock images in one place. It was frustrating at times with my slow computer and getting everything to blend together, but ultimately I'm really happy with how it turned out.
Let me digress a moment. My computer is ridiculously slow, especially with the size of the photoshop file I was working with. The original image was going to be 4.75 feet (1.45 meters) wide, and almost the same height. For some reason, I was reluctant to resize it because I didn't want to reduce the quality and I got it in my thick head that I would one day have it printed out on canvas. I'm crazy. Anyway, Photoshop made my mind up for me by saying it was too large to save, so I cut it in half. I probably should have done a quarter size because it froze everytime I attempted to do anything, but I made it work. Eventually.
I started by making a cube. Then I deleted the cube because I didn't like it. Then I created the boundaries. I looked through literally thousands of stock images for the man and two mermaids in the design. The man with the rope was originally pulling on the rope with his feet positioned much differently (see behind the scenes below). I used the amazing puppet warp feature in Photoshop for the first time to move his legs so that it appears he is on level ground.
The redhead mermaid was hanging onto a ladder. She didn't neeed much editing, other than her hands, which were cut off in the photo. I used another photo of her and gave her full hands. It may seem odd to have mermaids wearing normal clothes, but I liked both of the photos so much, I decided to integrate the skirts around their tails, and I think it works.
After I had gotten everyone set up, the real work began. I began by adding the stanchions and caution tape, because I felt that if a place like this really existed, people would put something up in order to protect others from walking into it. Then I added the stone ground, sand, ocean, and textures. From there, I added sealife and objects as I found them. I had the idea of me being pulled by a rope from the beginning, but I wasn't sure how to make it work until I was almost finished with the design. I took about 30 photos of myself before I got the right position. Not because I'm vain, but because the lighting made it grainy on my phone (I wish I had a DSLR, but sadly I do not), my arms were blurry, I wasn't facing the correct direction, my sweater was pushed up to my neck, etc.
Getting us to hold each other's wrists was one of the more tricky tasks. I had to take several more pictures of my hands to get it right. Originally, I had envisioned my wrists tied up and [at the time, the unknown] mermaid to be holding my feet. But the more I thought about it, the more uncomfortable I was forcing someone to be holding my feet like that, even if it is photoshopped. I think it makes it more meaningful for them to be holding onto one another like this (I refer to myself in the third person when I use me in my designs. I think it makes it less embarrassing for me).
So, yeah. Long description in which I don't go into a whole lot of detail about how I made it. Basically cutting everything out, adding a bunch of adjustment layers to get them to blend with the surroundings, and shadows. Any yet again, I forgot to take screenshots as I worked on it, so all of the behind the scenes images (more than usual for a more complex project) are screenshots with less and less layers and blending modes. But check them out below anyway. You can kind of see a lot of what went into it. I hope you like it, I'm pretty proud of this one.
Thank you to the MANY people who provided stock photos! And I apologize to anyone viewing this on a mobile device, since that meant you had to scroll through the ubiquity of credits before seeing the image.
BEHIND THE SCENES